When it comes to CNC machining1, the precision of your design is everything. The accuracy of a technical drawing will directly influence the quality and performance of the final part. But how do you prepare a technical drawing that meets the needs of CNC machines?
A technical drawing for CNC machining is a detailed, precise blueprint that guides the machine to create parts according to your specifications. It includes dimensions, tolerances, material requirements, and more.
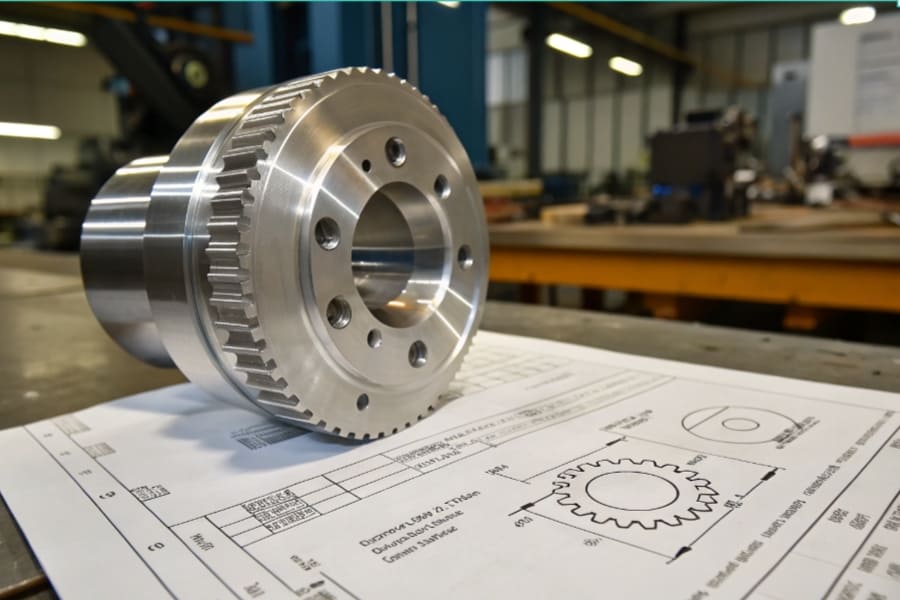
Now that we know what a technical drawing is, let’s break down the steps required to prepare one for CNC machining.
What are the steps to prepare a technical drawing?
The process of preparing a technical drawing for CNC machining involves multiple stages. From initial concept to finalized drawing, attention to detail is essential.
The steps to prepare a technical drawing for CNC machining include:
| Step No. | Action |
|---|---|
| 1 | Define the part’s geometry |
| 2 | Set accurate dimensions and tolerances |
| 3 | Choose the correct material |
| 4 | Specify machining processes |
| 5 | Include necessary annotations and notes |
Before starting, it’s important to fully understand the part you want to create. Make sure you clearly define its shape, size, and material. Then, use precise measurements and add any specific notes regarding finishes or Surface treatments2.
Step 1: Define the part’s geometry
Accurately defining the part’s geometry is the first crucial step. This involves creating a clear and understandable outline of the part’s overall shape and its individual features. Depending on the complexity of the part, this may include sketches, wireframes, or preliminary models. Geometry should reflect all critical features, including holes, threads, and cutouts, and any other critical dimensions that will affect machining or assembly.
Step 2: Set accurate dimensions and tolerances
Dimensions and tolerances are the heart of the drawing. You need to define the size of each feature in the design, including length, width, height, and diameter. It’s also critical to set the correct tolerances — the acceptable limits of deviation for each dimension. For example, if a hole is intended to fit a specific bolt, the tolerance will define how much variation is allowed to ensure proper fit.
Step 3: Choose the correct material
Material selection is crucial because different materials respond differently during machining. Materials vary in hardness, Machinability3, and Thermal expansion4, all of which impact the machining process. For example, softer materials like aluminum may require different cutting speeds and tools compared to harder materials like steel. Be sure to specify the Material type5 and grade that aligns with the functional and aesthetic needs of the part.
Step 4: Specify machining processes
Specifying the machining processes ensures that the CNC operator understands the steps necessary to create the part. Whether it requires milling, turning, drilling, or a combination of these, be sure to note the required processes. This can also include additional instructions regarding machining strategies, such as tool changes, feed rates, or any specialized equipment that may be required.
Step 5: Include necessary annotations and notes
Annotations and notes can cover a wide range of details that may not be immediately obvious from the drawing itself. This can include Surface finish6 requirements, any assembly instructions, or special considerations regarding tolerances or material properties. It’s important to ensure these notes are clear and easy to interpret, to avoid confusion during machining.
What are the five elements of technical drawing?
Technical drawings are built on key components that make them useful and precise. Each of these elements serves a specific purpose in ensuring the final product meets the design specifications.
The five elements of technical drawing are: 1) Views, 2) Dimensions, 3) Tolerances, 4) Material specifications, 5) Surface finish requirements.
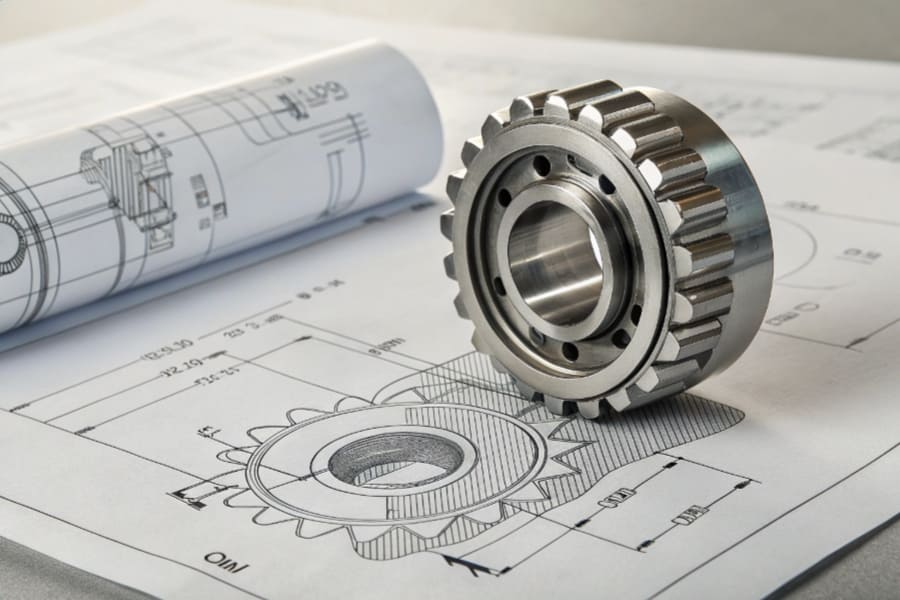
These elements guide the CNC machinist in understanding the part fully, ensuring the machining process is accurate and efficient.
| Element No. | Element Name | Purpose/Description |
|---|---|---|
| 1 | Views | Shows different perspectives of the part to ensure full understanding of its features |
| 2 | Dimensions | Specifies the size, location, and relationships between features of the part |
| 3 | Tolerances | Defines the permissible variations in dimensions, ensuring part functionality |
| 4 | Material specifications | Indicates the material properties that affect machining parameters |
| 5 | Surface finish requirements | Specifies the desired texture or smoothness of the part’s surface |
1) Views
A technical drawing usually includes multiple views of the part, each showing different perspectives to provide a complete understanding. Common views include the top, front, side, and isometric views. A good set of views should communicate every feature clearly and help the machinist understand the spatial relationship between the different parts of the design. When designing for CNC, you may need to include exploded views or section views to further explain complex features.
2) Dimensions
Dimensions are the most critical part of any technical drawing. They specify the sizes of features, the location of holes, and the relationships between various parts. Each dimension should be as precise as possible to minimize errors in manufacturing. Additionally, dimensioning techniques should follow industry standards, like the ANSI or ISO systems7 , to maintain consistency across the design.
3) Tolerances
Tolerances are the permissible variations in dimensions. They help to define how "perfect" a part needs to be. CNC machining can achieve high precision, but it is important to define acceptable limits to avoid over-engineering, which can increase cost. Specifying too tight a tolerance may result in excessive machining time and tool wear, whereas too loose a tolerance might impact the part’s functionality.
4) Material specifications
Including the correct material specifications is essential for the machinist to understand how the part will react during machining. Material properties, such as hardness, Thermal conductivity8, and machinability, will dictate the tool choice, cutting speeds, and other machining parameters. Clearly specifying the material type and grade ensures the machinist selects the appropriate tools and settings for the job.
5) Surface finish requirements
The surface finish refers to the texture and smoothness of the final part’s surface. Depending on the part’s function, it may require a specific finish, like a rough or smooth surface. Surface finish is typically specified with a code such as Ra (roughness average)9, and should be clearly stated on the drawing. Achieving the correct surface finish often requires additional machining steps like polishing or grinding, and it may affect the choice of materials and machining processes.
Why are dimensions so crucial in technical drawings?
Dimensions are crucial because they provide the necessary information to ensure the part is manufactured to the exact specifications required. A lack of dimensioning can lead to errors in manufacturing, where parts may not fit together as intended or function incorrectly. Precise dimensions allow for the consistent production of parts, especially when large quantities are being made. The more detailed and clear the dimensions, the less room for interpretation and error.
How do tolerances affect the CNC machining process?
Tolerances are a critical factor in CNC machining as they determine the acceptable range of variation in the manufactured part. Tight tolerances can increase machining time and cost, while loose tolerances may result in functional issues, such as poor fit or misalignment. For CNC machinists, understanding tolerances ensures that they know how precisely they need to cut the part, which tools to use, and how much material to remove. By clearly defining tolerances, designers can balance between cost and precision.
What are the 6 basic lines used in technical drawing?
Every technical drawing relies on specific line types to communicate different features or dimensions clearly. Understanding these lines is crucial for interpreting or creating technical drawings.
The six basic lines used in technical drawing are: 1) Continuous line, 2) Dashed line, 3) Chain line, 4) Centre line, 5) Hidden line, 6) Break line.
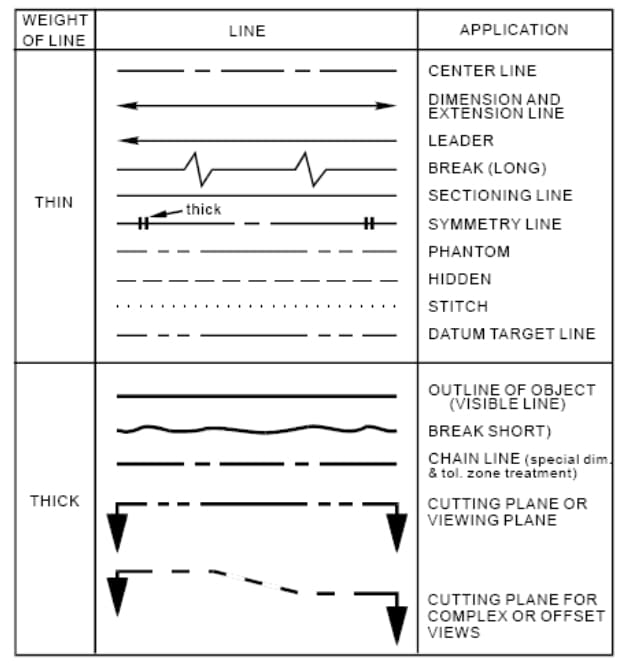
These lines help to indicate edges, hidden features, and symmetry, making it easier for manufacturers to read and interpret the drawing.
| Line Type | Description |
|---|---|
| Continuous line | Represents visible edges or outlines of the part |
| Dashed line | Indicates hidden features or edges that are not visible in the current view |
| Chain line | Used to represent centerlines or axes of symmetry |
| Centre line | Special chain line indicating the exact center of circular or symmetrical features |
| Hidden line | Represents hidden edges or features behind or inside the part |
| Break line | Used to shorten long or repetitive sections of the part |
1) Continuous line
The continuous line is used to represent visible edges or outlines of the part. These lines are the most common and show the exact perimeter or shape of the part. They are thick and solid to indicate that the feature is clearly visible in the current view.
2) Dashed line
Dashed lines indicate features that are hidden from view. These might include internal holes or features that would be visible if the part were cut or viewed from a different perspective. Using dashed lines allows the machinist to understand the complete geometry, even if it’s not directly visible.
3) Chain line
Chain lines are used to represent centerlines or axes of symmetry. These lines help to identify the geometric center of a feature, such as a hole or a circular feature. Chain lines are often used to aid in positioning parts symmetrically or aligning tools on the CNC machine.
4) Centre line
The centerline is a special type of chain line that indicates the exact center of circular or symmetrical features. It is often used to mark the center of holes, arcs, or rotational features. The centerline guides the CNC machinist when aligning tools for precise cuts and drilling.
5) Hidden line
Hidden lines indicate edges or features of a part that are not visible in the current view. These lines are typically drawn as a series of short dashes and are used to represent features that lie behind or inside the visible part of the object. They are crucial for a full understanding of the part’s geometry.
6) Break line
Break lines are used to shorten long or repetitive sections of a part. Instead of drawing an entire long feature, break lines allow designers to represent just a segment of the feature while indicating that the rest of the part exists beyond the visible area. This saves space and keeps the drawing clear and focused.
How do hidden lines impact the accuracy of a drawing?
Hidden lines are essential for creating a complete representation of a part’s geometry. They allow the machinist to see features that are not immediately visible in the chosen view but are crucial for the machining process. For instance, a hole located behind a solid feature may be missed without the use of hidden lines, which could result in an incorrect machining process. By using hidden lines properly, you ensure that the machinist understands the part in its entirety.
Why is the centerline important in CNC machining?
Centerlines are vital because they help to define the axis of rotation or symmetry for machining operations. When working with round or symmetrical parts, the centerline guides the CNC machinist in setting up tools and ensuring parts are aligned properly for machining. Without a clear centerline, it can be challenging to ensure that parts are properly aligned, especially when performing operations like drilling, turning, or milling.
What must all be included in technical drawings?
A technical drawing for CNC machining1 isn’t just about the shape of the part. It must contain everything a machinist needs to produce the part accurately.
Every technical drawing must include: 1) Part name and description, 2) Scale and views, 3) Dimensions and tolerances, 4) Material type, 5) Surface finish, 6) Notes or special instructions.
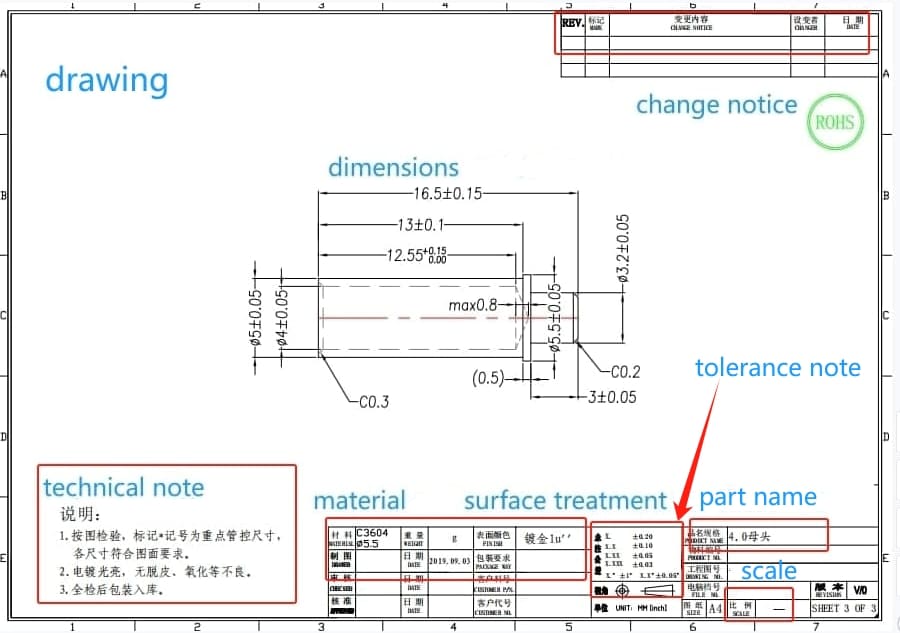
These elements provide the machinist with a complete understanding of the part’s design, ensuring it can be fabricated to spec.
| Element No. | Required Element | Purpose/Description |
|---|---|---|
| 1 | Part name and description | Helps identify the part and briefly explains its function and purpose. |
| 2 | Scale and views | Shows the proportion of the part and different perspectives (views). |
| 3 | Dimensions and tolerances | Defines sizes and allowable variations to ensure accurate machining. |
| 4 | Material type | Specifies the material to ensure correct machining methods and tool selection. |
| 5 | Surface finish | Defines the final texture or smoothness of the part’s surface. |
| 6 | Notes or special instructions | Clarifies additional requirements like assembly, Heat treatment10, etc. |
1) Part name and description
The part name and description help to identify the part and provide a brief overview of its function. This information is essential, particularly in larger manufacturing operations where multiple parts are being produced. A part name should be unique, concise, and informative, while the description should explain the role of the part and any key functional considerations.
2) Scale and views
The scale refers to the proportion between the size of the part in the drawing and its actual size. This is particularly important when dealing with large or small parts that would be difficult to represent at full size. Views, as mentioned earlier, should show different perspectives of the part, such as the front, side, and top views, as well as any section or detail views to highlight areas that require extra attention.
3) Dimensions and tolerances
As already discussed, dimensions define the size and location of features on the part, while tolerances specify the allowable variations. Including both dimensions and tolerances on a drawing ensures that the part will meet the required fit and function. This can include not just overall dimensions but also hole sizes, thread specifications, and even angular tolerances for precise alignments.
4) Material type
The material specification ensures that the machinist knows exactly what material the part is made from, which is critical for choosing the right cutting tools, speeds, and feeds. The material choice impacts both the machining process and the performance of the finished part. Materials are usually identified by their standard designation (e.g., "AISI 1045 steel" or "6061 aluminum"), and specific attributes like hardness or finish might also be noted.
5) Surface finish
Surface finish is a key specification, as it dictates the part’s final texture, appearance, and performance. A part’s surface finish can influence its functionality, particularly in applications where friction, wear, or aesthetic appearance are important. Surface finishes are usually specified by their Ra value, or average roughness, which can be critical for tight tolerances and the part’s intended use.
6) Notes or special instructions
Notes or special instructions clarify any additional requirements or considerations that don’t fit neatly into other categories. This might include assembly instructions, heat treatment processes, or additional requirements for secondary operations like welding or coating. It’s important to be as clear and concise as possible in these notes to avoid any misunderstandings.
What are the three main types of technical drawing?
There are various types of technical drawings, but when preparing for CNC machining, it’s important to focus on the three main types that serve different purposes in manufacturing.
The three main types of technical drawing are: 1) Orthographic projection, 2) Isometric drawing, 3) Sectional drawing.
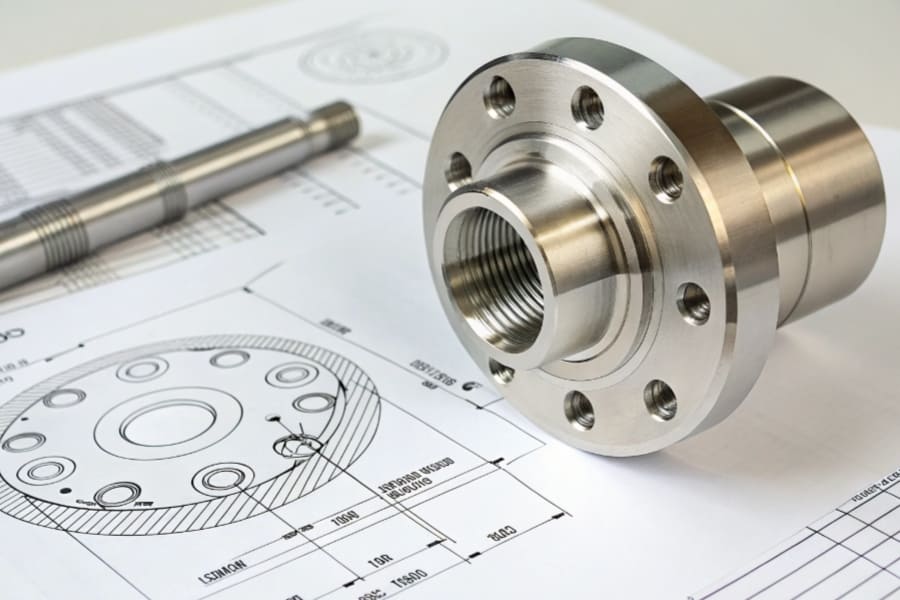
Each of these types of drawings provides a different perspective and level of detail, all crucial for producing an accurate part.
| Drawing Type | Description |
|---|---|
| 1) Orthographic projection11 | Represents a 3D object in two dimensions using multiple views. |
| 2) Isometric drawing12 | Provides a 3D perspective of a part using equal angles for axes. |
| 3)Sectional drawing13 | Cuts through a part to reveal internal features. |
1) Orthographic projection
Orthographic projection involves representing a 3D object in two dimensions by using multiple views of the object from different directions. Typically, this includes a front view, top view, and side view. Orthographic projections are essential for conveying accurate dimensions and relationships between features, as they provide multiple angles that help the machinist visualize the geometry of the part.
2) Isometric drawing
Isometric drawings provide a 3D perspective of a part, where all three axes (X, Y, and Z) are shown at equal angles to give a clear, three-dimensional view. This type of drawing is particularly useful for understanding the shape and depth of parts, especially when complex geometries or assembly configurations are involved. Isometric drawings are helpful in visualizing how parts will fit together or appear once assembled.
3) Sectional drawing
A sectional drawing cuts through a part to reveal its internal features, providing a clearer understanding of complex geometries that might be difficult to comprehend from external views alone. This is particularly useful when dealing with parts that have internal cavities, holes, or other internal features that need to be precisely machined. Sectional views are drawn by imagining the part being sliced in half and showing the cross-sectional profile. This allows for a more detailed and accurate interpretation of the part.
How do sectional views help in CNC machining?
Sectional views are indispensable in CNC machining when the part has internal features that cannot be seen in external views. For example, internal grooves, passages, or chambers often need precise machining, but these details might not be visible from a standard side or top view. By adding sectional views, the designer can clearly communicate the internal features to the machinist, ensuring no critical details are missed during production. Sectional views also simplify the interpretation of complex geometries by presenting them in a clearer, more understandable format.
Why are isometric drawings helpful in visualizing parts?
Isometric drawings help visualize parts in three dimensions, making them useful for understanding how a part will look when assembled or when the final product is completed. While orthographic projections give precise details of each face of a part, isometric drawings provide a more holistic view of the part’s shape and how different features come together. This can be particularly helpful in understanding the relationships between various features, such as holes or cutouts that may not be immediately apparent in 2D views.
How to design something for a CNC machine?
Designing for CNC machining requires a specific approach, as the machine has unique capabilities and constraints. Understanding these can help you create a design that is both manufacturable and cost-effective.
Designing for CNC machining involves: 1) Simplifying the design for machining, 2) Avoiding complex geometries that are difficult to machine, 3) Adding enough tolerance, 4) Considering the material and machining time.
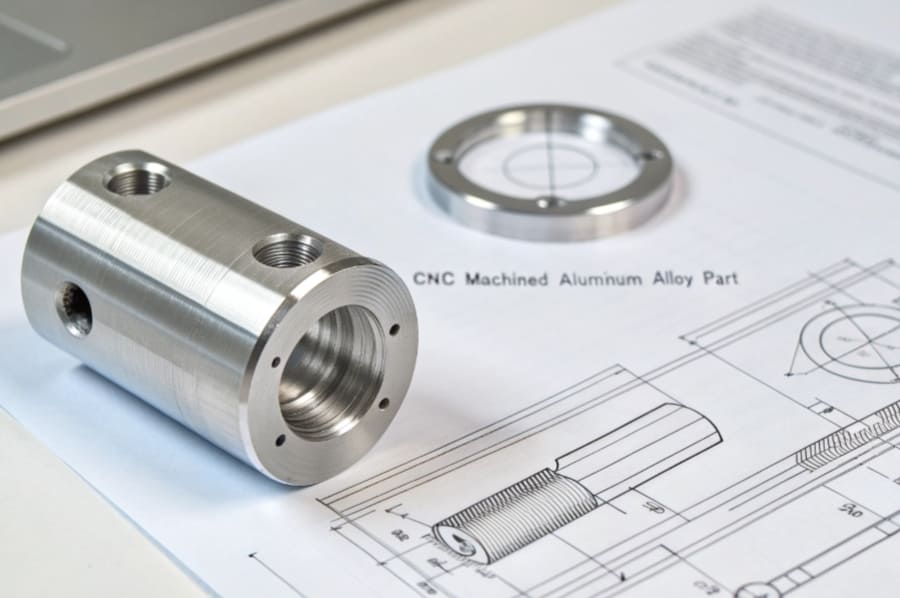
The more optimized your design, the faster and cheaper the machining process will be.
| Design Consideration | Purpose/Explanation |
|---|---|
| 1) Simplifying the design for machining | Reduces machining complexity, improving speed and cost efficiency. |
| 2) Avoiding complex geometries | Prevents difficult and costly features, improving manufacturability. |
| 3) Adding enough tolerance | Ensures precise fits without over-engineering, balancing cost and performance. |
| 4) Considering the material and machining time | Aligns design with material properties to optimize machining time and tool selection. |
1) Simplifying the design for machining
When designing for CNC, simpler shapes are generally easier and more cost-effective to machine. Complex geometries, such as intricate curves or tight radii, can lead to increased tool wear and longer machining times. One key to effective design is to simplify the shape wherever possible, while still meeting functional requirements. For example, instead of complex curved features, consider using straight lines, chamfers, or fillets that are easier to machine.
2) Avoiding complex geometries that are difficult to machine
Some features, such as deep holes or sharp corners, may be difficult or expensive to machine. The deeper the cut or the more intricate the detail, the more challenging it becomes for the CNC machine to achieve the desired result. By understanding the limits of the CNC machine and avoiding overly complex designs, you can create a more efficient and cost-effective part. It’s important to remember that not all shapes are equally feasible for machining — some may require additional operations, specialized tools, or increased machining time.
3) Adding enough tolerance
When designing a part, it’s essential to understand the relationship between tolerance and manufacturability. Tight tolerances require more precision in the machining process, which can increase time, cost, and complexity. On the other hand, overly loose tolerances might lead to a part not fitting or functioning properly. Striking a balance is key — use the tightest tolerances where necessary and allow for wider tolerances in non-critical areas to save on time and cost.
4) Considering the material and machining time
The choice of material directly affects the machining process. Harder materials take longer to machine and require specialized tools, while softer materials are easier and faster to cut. Additionally, the material’s behavior during machining can affect tool wear and machining time. For example, materials like aluminum are relatively easy to machine and typically have shorter cycle times, while stainless steel or titanium may require slower speeds and additional tool changes. Make sure to factor in the material choice and associated machining time when designing your part for CNC.
Why is material selection critical in CNC design?
Material selection is crucial because it determines the behavior of the part during machining and its final performance. Different materials have different properties, such as hardness, strength, thermal conductivity, and machinability. These properties influence cutting speeds, tool choices, and feed rates, as well as the durability and functionality of the finished part. Understanding the material’s characteristics ensures that the design is optimized for the machining process and that the final product meets the required performance standards.
How does the choice of geometry affect machining time?
The geometry of a part directly impacts machining time because more complex shapes often require longer cutting times, more tool changes, and potentially slower feed rates. For example, intricate internal features, deep pockets, or complex curves can slow down the machining process and increase the number of passes the machine needs to make. On the other hand, simpler shapes with straight cuts, fewer features, and consistent depths tend to be faster to machine. Minimizing unnecessary complexity can help reduce machining time and lower costs.
What type of software is used to create designs for CNC?
CNC machining relies on software to translate your design into machine-readable instructions. Understanding which software to use is key to ensuring your design can be fabricated accurately.
Popular software for CNC design includes: 1) AutoCAD, 2) SolidWorks, 3) Fusion 360, 4) Rhino, 5) CATIA.
These programs allow you to create detailed 2D and 3D models, which are essential for CNC programming.
| Software | Description |
|---|---|
| AutoCAD | Widely used for 2D and 3D drafting, ideal for technical drawings. |
| SolidWorks | 3D modeling software that integrates well with manufacturing processes. |
| Fusion 360 | Cloud-based software offering both CAD and CAM tools for CNC machining. |
| Rhino | Known for its flexibility in creating complex 3D models. |
| CATIA | Advanced software used for complex engineering design and simulation. |
Why is CAD software essential in CNC machining?
CAD software is essential because it allows designers to create precise 3D models of parts, which serve as the foundation for CNC machining. These digital models are then translated into machine-readable instructions, ensuring that the CNC machine can accurately replicate the design. CAD software also enables the creation of detailed technical drawings, complete with dimensions, tolerances, and material specifications, that guide the machinist in producing the part.
How do CAM programs work with CNC machines?
CAM (Computer-Aided Manufacturing) software works in conjunction with CAD programs by converting the 3D model into machine-readable instructions (often called G-code) that tell the CNC machine how to move its tools to produce the part. CAM software helps optimize the toolpath, cutting speeds, feeds, and machining strategies, ensuring efficient and accurate production. Without CAM software, CNC machines would be unable to operate based solely on CAD designs, as they need precise instructions for each cutting operation.
What file format is used in CNC machining?
File formats are critical in CNC machining as they define how your design is interpreted by the machine. Choosing the right format ensures the machine can accurately follow your design.
The most commonly used file formats for CNC machining are: 1) DXF, 2) STL, 3) IGES, 4) STEP.
These file formats contain the necessary data for CNC machines to produce your part.
| File Format | Description |
|---|---|
| DXF | Common format for 2D designs, widely used in CNC machining. |
| STL | Used primarily in 3D printing but can also be used for CNC, especially for complex geometries. |
| IGES | A format used to exchange 3D geometry data between different CAD systems. |
| STEP | A format used for 3D models, suitable for detailed part information. |
Why is DXF so commonly used in CNC machining?
DXF (Drawing Exchange Format) is widely used because it’s compatible with many CAD software programs and provides detailed 2D geometries for CNC machining. This format is ideal for simple 2D designs, like cutting patterns or flat parts, and can easily be interpreted by CNC machines, making it one of the most common file formats used in the industry.
Can an STL file be used for CNC machining?
STL files are primarily used for 3D printing but can also be used in CNC machining, especially for parts that require 3D models. However, STL files are less suitable for standard CNC machining compared to formats like DXF or STEP because they represent the part’s surface geometry as a mesh of triangles, rather than precise vector data. As a result, CNC machines need additional processing to convert STL files into toolpaths.
Conclusion
In summary, preparing a technical drawing for CNC machining1 requires understanding the key elements of the design and the process. By following the steps, using the right software, and choosing the correct file formats, you can ensure a successful CNC machining project.
CNC machining is an essential process for producing high-precision parts. ↩ ↩ ↩
Surface treatments are necessary to enhance the surface properties of parts. ↩
Learn more about Machinability, which is a key factor in choosing the right material for CNC machining. ↩
Thermal expansion plays an important role in material behavior during machining. ↩
Material type affects machining techniques, tool wear, and part quality. This guide provides you with the necessary knowledge to choose the right material for your CNC project. ↩
Surface finish is an essential aspect of CNC parts. The linked resource provides a deep dive into different surface treatment methods and their impact on the overall functionality and aesthetic of parts. ↩
The ANSI or ISO systems offer standard guidelines for dimensioning in technical drawings. This resource will help you understand these international standards to maintain consistency across your drawings. ↩
Learn more about Thermal conductivity, a material property that is essential for machining, especially when dealing with heat-sensitive materials. ↩
Understanding Ra (roughness average) is critical for specifying surface finish in CNC machining. ↩
Heat treatment is often a necessary process to improve the mechanical properties of materials. ↩
Orthographic projection is a method of representing a 3D object in two dimensions. This drawing technique is essential for showing the part’s different views (e.g., top, front, side), which helps the machinist understand its geometry. ↩
Isometric drawing offers a 3D perspective of the part. Understanding how to read or create isometric drawings will help with visualizing and machining more complex, three-dimensional parts. ↩
Sectional drawing provides detailed views of a part’s internal features. This drawing method is important for understanding the internal geometry and how different features align within the part. ↩
